Monday, April 4, 2016

Summer Art Journal Page with Sharon

Hi everyone

Hope you have all been enjoying a summer break ( although I think at times we all need a break from summer with these hot temps we have been having!)

I have been playing in my art journal this week, and am going to share with you my art journal page "Summer" .  These are the three Imagine if stencils I have used in the making of my page.


The first step is to create a back ground using a variety of acrylic paints, scratching some designs into the paint while wet ( Sometimes, I make my art journal pages on smooth white card, and then glue that into my album ....this is what I did this time ) I have used  various shades of blues and aquas.

Next choose a stencil and using a sponge apply colours to suit on top of the dried back ground. Alter the colours around the page to create depth of colour
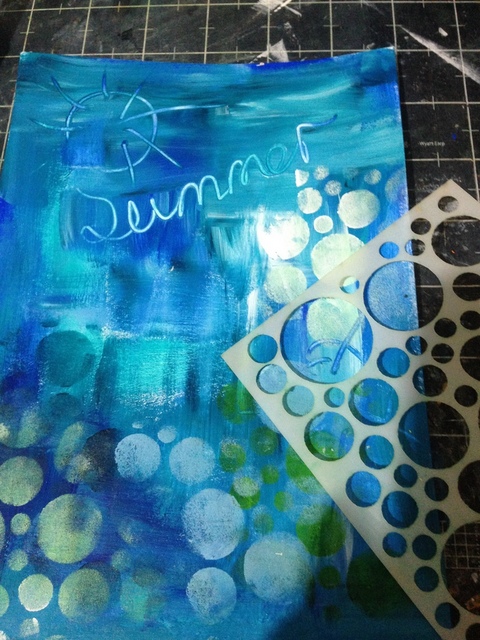
Highlight some of the circle shapes using either a white journal pen, or a paint applicator which creates fine lines. 


After the last step has dried, add the circular stencil in the top corner using a bright yellow.....to sort of represent the sun, and then stencil the girls face using a dark colour. ( I used indigo) Once this is dry, shade around the jawline with a black gelato, and smudge to fade out. 

Using a fine paint brush or applicator squiggle some aqua "waves along the base. Use indigo paint to add cross hatches, and "smoosh" around the edges to create a rustic border. Also paint the lid of a spray bottle and stamp random circles in the dark colour.
                                                    

Finally add some red gelato like "lippy" to the  lips, and using a damp cotton bud, spread to fill in the lip shape.
Type out some journalling on coordinating scrap of paper, and adhere to the page. Add another touch of red in the form of a gauze heart to introduce another touch of the red.

Thanks for looking.

Cheers
Sharon

Birdcage Canvas with Tracy

Hello, today I want to share a canvas I created that has a neat little bird cage on it so its quite a 3d canvas. I just knew I wanted to use the birdcage it was just a matter of putting on my brave face and cutting it in half so it fits flat on the canvas. So first used I used Gesso on the canvas to prime it, then place my chipboard elements on it. As you can see from the photo below I only had a few on it, then decided to add more until I was happy, but these were the main elements - Branches, Birdcage and of course those cute little mushrooms.
Before sticking everything down I used circle template and texture paste to give background a little bit of interest. After placing gesso over everything I then mixed up two spray bottles of colour, one using Art Ingredients Mica Powder - Copper and Art Ingredients Mica Powder - Teal.
After spraying colour and allowing time to dry I then sprayed whole canvas with Matte Medium mixed with water to set the colour so it doesn't rub off.
 And a few close ups....
Hope you enjoyed looking at my project and maybe even gave you a little inspiration. Mixed media is so easy and fun to do,,,, if you haven't done canvas I highly recommend you give it a go! Until next time,,, happy crafting. Tracy
Items used
Chipboard Birdcage
Chipboard Mushrooms
Flowers

Tuesday, March 15, 2016

Mixed Media Page with Sharon

Hi everyone.

Today I am sharing with you a mixed media scrapbook page.

To begin, use some texture paste and spread through the Imagine If Stencil Turkish design in some random places around the page, and allow to dry. Using a stamp, stamp with acrylic paint all around the page using a coordinating paint colour. Finally stamp with another coordinating colour of acyrlic paint using a sponge dauber to get faint circles. Just stamp in a few places....less is more!!!! Allow to dry thoroughly


Now the scary part!!!!! Spray a couple of coordinating sprays over the dried background. Dry with a heat gun if you are impatient!!


Time to add flowers etc !!!

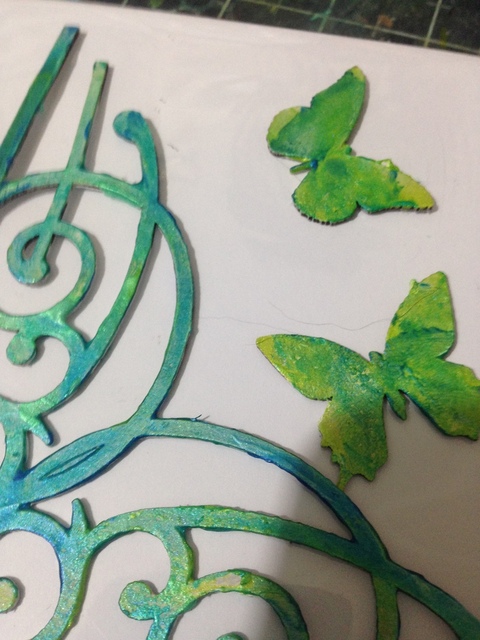
Cover your Imagine If Chippies with white gesso, then finger paint them with metallic paints in three coordinating colours... I have used Lime, aqua and cobalt blue.  Adhere them and the photos to your page as desired.

FINALLY. the finished page!!! 


Thanks for looking, and see you next time, Sharon 


Sunday, March 6, 2016

March newsletter


Happy March everyone,

I had a lovely few hours off today and headed to the coast and checked out the beach in Raglan.  It was really nice to get away and feel quite refreshed again, as it has been a busy start to the year.  I love water and do find it quite relazing, which is probably why we have 5 ponds on our property and two fish tanks. It's probably just as well I havn't worked out how to papercraft a fish tank or have I?  I was just working on a school holiday plan and I was thinking that perhaps a fish tank would be fun to make.  Watch this space.

Alysha has been really busy with invitations, Wedding, birthday, and baby shower and even a 40th.  Do you want something different? Come and have a chat to her.
In the meantime here is some advice:
So you just got engaged? CONGRATULATIONS!
That's the first very exciting step towards your wedding and married life together YEAH!But there are many more steps between now and then, all of them important when planning a wedding!
Do you know the steps you need to take now?
Many people know they need to set a date, pick a venue, look at caterers and photographers, starting looking for a dress and flowers... all that obvious stuff....   but do you know how far out from the wedding you need to send invitations? Do you know when you send save the dates if you want them? Do you know what date to set for the RSVP? or How to address your envelopes and invitations? Do you know how to word your invitations if you don't want children at your wedding? or If you should individual invites or combined invites for people/families living in the same house?
If not - no need to worry, that's what we are for!  Come and see me at Imagine If Creative Studios! I know just how to help you with these questions and many more.
We can help with wedding invitations - ceremony &/or reception only invite wording, embellishments, envelopes, maps, RSVP cards, transportation cards, menu's, seating charts, place cards, ceremony programs, wedding thank you cards, engagement party invites & thank you cards, wishing well wording and soooooo much more!
We have a range of designs in store or we can custom make a design that fits your theme, personality and style!
Take the stress out of your Wedding Stationery worries and let put together the perfect designs for your big day!


Alysha is in store Tuesday and Thursdays! or other times by appointment.


Classes:

Weekly classes:
Scrapbooking class 10am - 12pm  Full

Card class 10am - 12pm
We have a couple of spaces in our card classes which are on every 2nd Friday $12.00 for 2-3 cards, everything supplied. 

Thursday night 6pm - 8pm
This is an open class, you can chat and craft, scrapbooking, cardmaking whatever you would like to do.  The cost is $10.00 per person unless you are doing a kit from us.

12th March 10am-12.30pm Beach painting with Aly. $30.00
This is the first of many art classes we will be bringing you. Using old Pallet wood, as a base, you will create a painted beach scene. This is a great way to learn the basics, with Aly, who loves to play with colour, including shading and texture.  Learn to add your base, and then build up colour and shading to make your art work.  This class is designed for beginners, and children are welcome.

 SOLD OUT
19th March 9am - 3pm 9 scrapbooking pages in one day $70.00

2nd April - Cake Decorating part 1: $25.00 10am - 12pm. A couple of spots left.
In this class with Cheryl, you will be rolling out a fondant base for cupcakes, and learning to make fondant roses, and leaves.  You will have time to make at least two of everything.

19th April School holiday program begins.

Phone 078897838 for bookings or email us on imagineif@xtra.co.nz


That is it for this week.  We look forward to seeing you in store or hearing from you online.
If you are buying on line you will see what have a set price freight charge of $4.50, if the cost of your freight is less, we wil leither refund you or send a free gift.
Enjoy your week

JO


Cheryl has been busy again, and this is the 2nd of her set of little fireplaces.   Click on the link to take you to the blog. 


We have all of the new released Dylusion stamps in, those that have been released so far anyway.
If you are a journal person you are going to love these stamps. Check out Laugh till I leak, and how about never!  For those with a wicket sense of humour.


We have just received a new shipment of flower soft, it has been repackaged into smaller packaging which is awesome, and will fit into a small envelope now.  Which makes it heaps cheaper to post.
The colours are awesome, and if you make cards or any crafts really this is a great way to add texture.


Do you make your own invitations or looking for something for your cards, check out this selection from Kaisercraft called Lucky Dip! Awesome products, easy to use.


Hows this little cutie, made from wire it is great for fairy gardens which are very popular right now.  Click on the link to take you to the miniature page. 

Angelina fibres are back in stock, this is what I did last week in class with the peacock angelina.
We had a very loud class, and I was very surprised (not) by those of us who actually couldn't use the iron settings.  Oh and that included me!
Check out what we have instore at the moment by clicking on the picture.

Namaste - Ngaere

I have been playing around with colour today using an old book cover and some of the chipboard pieces from Imagine If.  Here is the finished project and below is the process.


I took an old book that I wanted to make into an Art Journal and covered it roughly with texture paste coloured with blue, yellow and red acrylic paint. I was not precise in applying the texture paste I just slapped it on randomly using a palette knife.


I added green coloured texture paste through a stencil to add more texture.


For more visual interest once the paste was dry I stamped randomly over the cover. Then because I find it hard to stop I added circles in dark blue and white and splattered watered down orange paint over the whole cover.


I then took the chipboard from Imagine If  and altered it using paint and paper.


Beginning with the tag which I first painted with white gesso I took a stencil from Imagine If and coloured the tag with two shades of blue paint.  I wanted to tie the tag into the cover but I also wanted it to stand out a bit from the background.


Again to tie it in I added some stamping and some orange paint splatters.


The female figure I covered in book paper and used spray, crackle paint and stamping to decorate her. The wings I painted with white gesso then I sprayed and stamped them.  The heart was painted with white gesso then red paint and I stamped into using bubble wrap.


I assembled the tag, the wings, the woman and the heart, then I glued them to the front of the cover. I wanted the petals of the flower cutout in the tag to frame her head and I wanted the star from the painted quote to sit just over her head, so I took all of this into consideration when I glued the pieces down.


I hope this has given you some ideas for different ways to use the amazing chipboard pieces and the stencil that Jo stocks at Imagine If. both on line and at her physical store in Morrinsville.  Jo also stocks the paints and mediums required for altered art, mixed media and art journaling.  Until next time Happy Crafting.